Settings
System Settings can be accessed by clicking on the Settings tab in the left panel. User can navigate to any desired Setting (with appropriate permission level) by clicking on the appropriate tab in the top ribbon.
Organization Settings
When the Organization Administrator is logged into their account in Workshop, a tab for Organization Settings will appear to the left of the Users tab. Settings that are available for Edit are Multi-Factor Authentication for the Organization, Export Management, and Ai Detection Settings. User can click Edit for any of the designated Settings and a Popup will appear with available Settings changes.
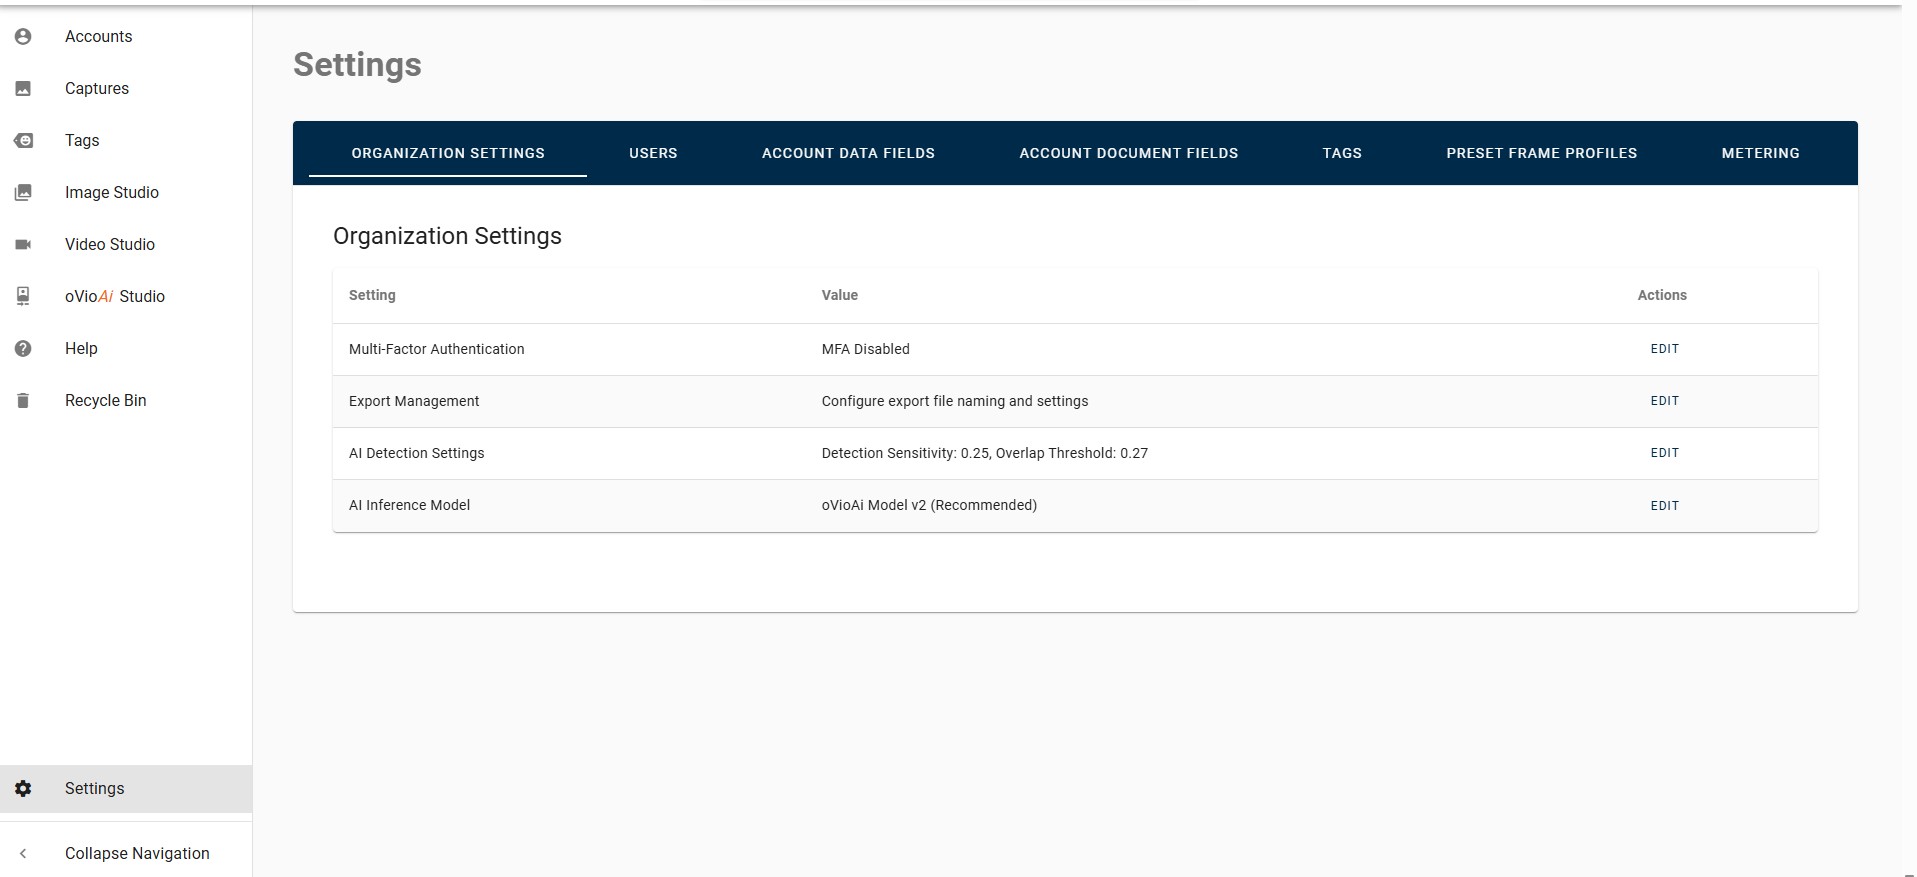
Multi-Factor Authentication (MFA)
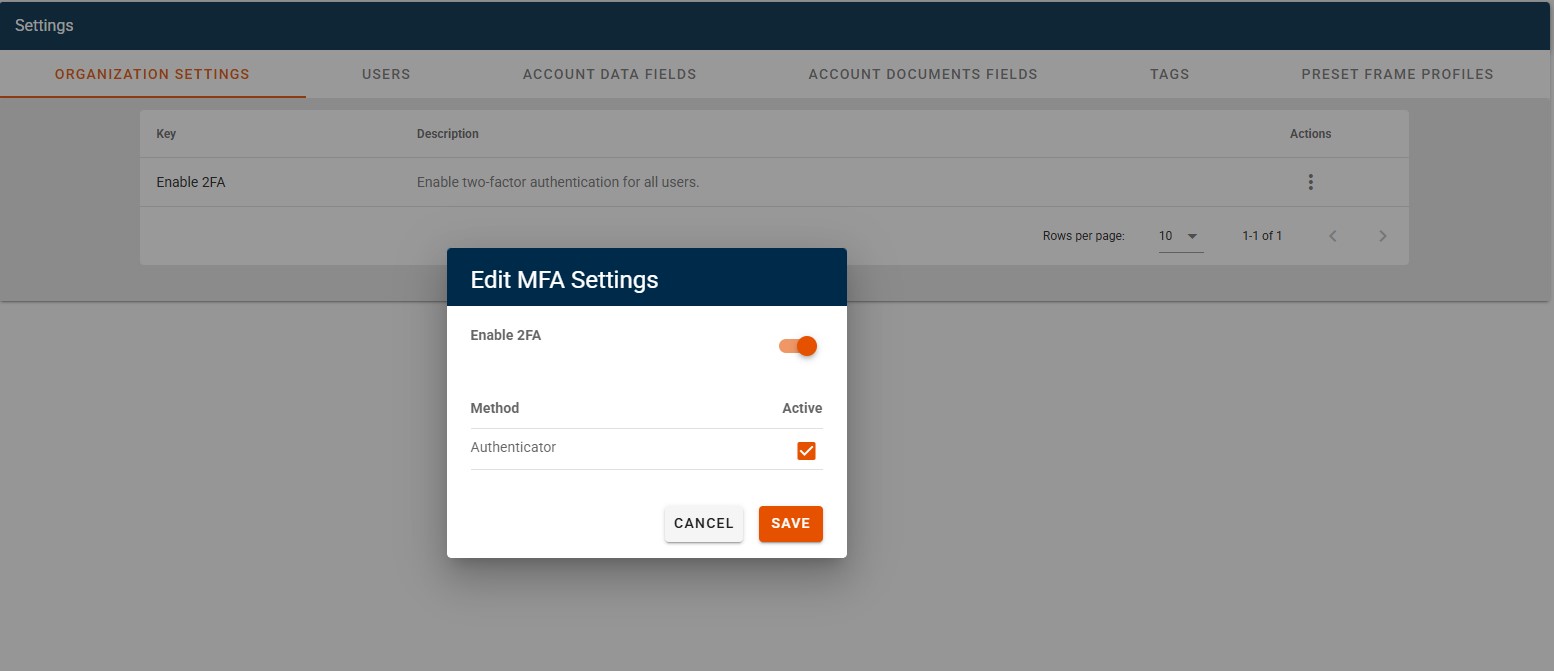
- A popup will appear with a button to enable or disable 2FA or MFA.
- Enable TOTP Authenticator (the only type used at this time) to complete the enabling process, followed by the SAVE button.
Export Management
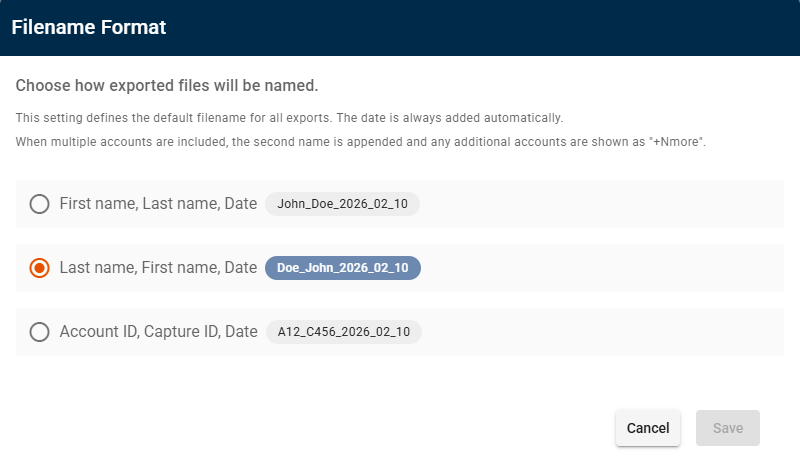
The Organization Administrator has the ability to determine the default naming convention for exported files within Organization Settings. Clicking Edit to the right of Export Management will generate a popup for selecting the automatic default naming for all exports.
Ai Detection Settings
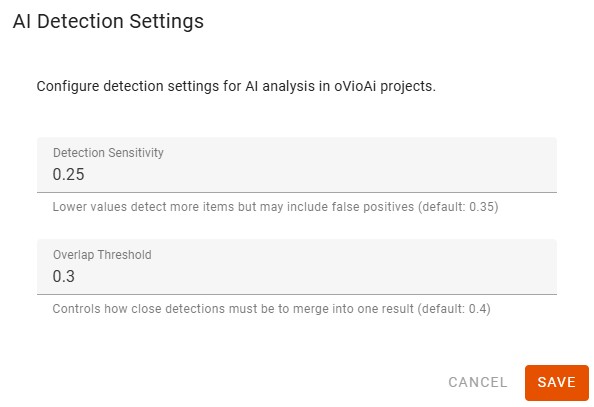
Settings related to Ai analysis can be set by the User. Detection Sensitivity can be increased or decreased from the default with a lower number showing more items but with a less confidence rate. Overlap Threshold refers to how close detections can be without being considered the same object.
Ai Inference Model
The Ai Inference Model used for Ai analysis is selectable by clicking on the Edit button to the right in Organization Settings. The default inference model is V2 and is the Recommended model to use.
Users
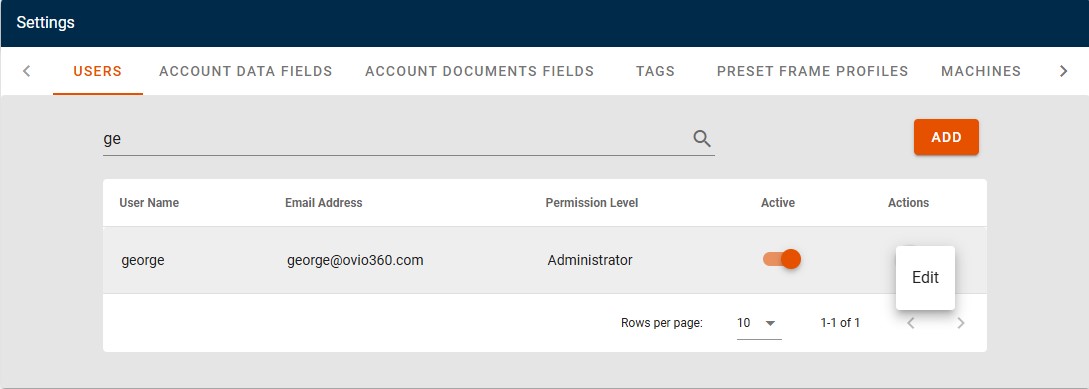
Users can be added by clicking on the +Add User icon, searched for using search as you type, or edited by clicking the ellipsis to the right of the User Name at which time a drop down menu will appear. Available otions are: Edit (change email or User level), Reset Password, Reset MFA (if enabled for the organization), Transfer Organization Administrator (only allowed to be transferred by current Organization Administrator) or Deactivate. After initial assignment of the Organization Administrator at the time of cloud deployment, the Organization Administrator may transfer their role to another Administrator. The default view for the Users tab is Active Users only. A button is available for visibility to Inactive Users.
User Account Activation and Password Reset
New Users will receive an email from support@ovio360.com with a link to activate their account and set and confirm a password. Password requirements are a minimum of eight characters with a mix including one upper case, one lower case, one number, and one special character. Users requesting a reset of their password through their Organization Administrator or through the "Forgot Password" function found on the login page will also receive an email from support@ovio360.com with a link to set their password.
User MFA Setup
If MFA is enabled all Users in the organization will need to follow the instructions below for User MFA Setup. If MFA is NOT enabled, there will not be any change to User login.
- After MFA is enabled for the organization, existing Users will be required to reset their passwords at their next attempted login if their passwords do not meet the minimum requirements outlined below. They will see a popup that indicates a link will be emailed to reset their password.
 If their password is already compliant with minimum standards they will proceed directly to MFA Setup shown below.
 - The link in the email will take the User to the Password Reset page to enter a new password.
- Eligible passwords will require a minimum length of eight characters comprised of a mix of upper and lower case, numeric and special characters.
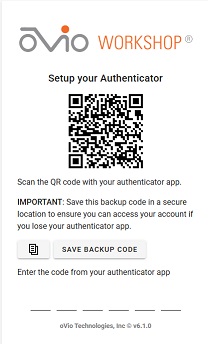
- User will be taken to the login page after successfully resetting their password at which time they will be directed to a page to setup their preferred Authenticator (Google, Microsoft, or any other TOTP based application) by scanning the provided QR code.
- Each subsequent login will require a new code from the same Authenticator.

User MFA Reset
If a User loses their connection to the Authenticator application, the Organization Administrator can Reset MFA for the User which will require the User to repeat the above process. The Reset function can be found in the Users tab by clicking on the elipsis next to the User requiring reset and then selecting Reset MFA. User will then be required to repeat the initial setup process after receiving a link for password reset.
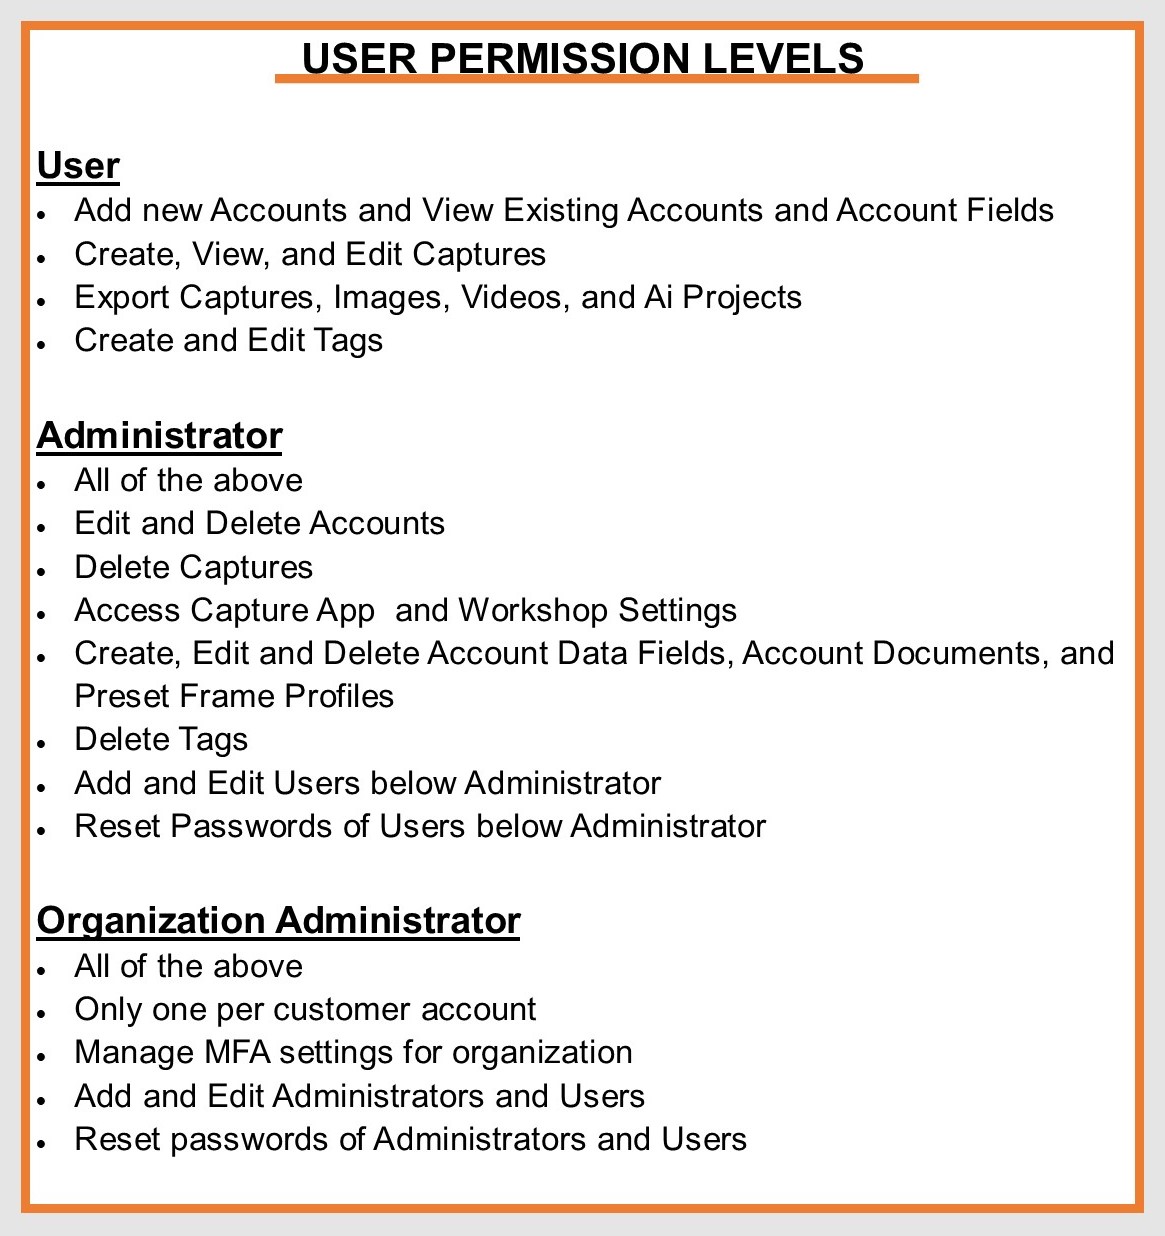
User Permission Levels
Account Data Fields
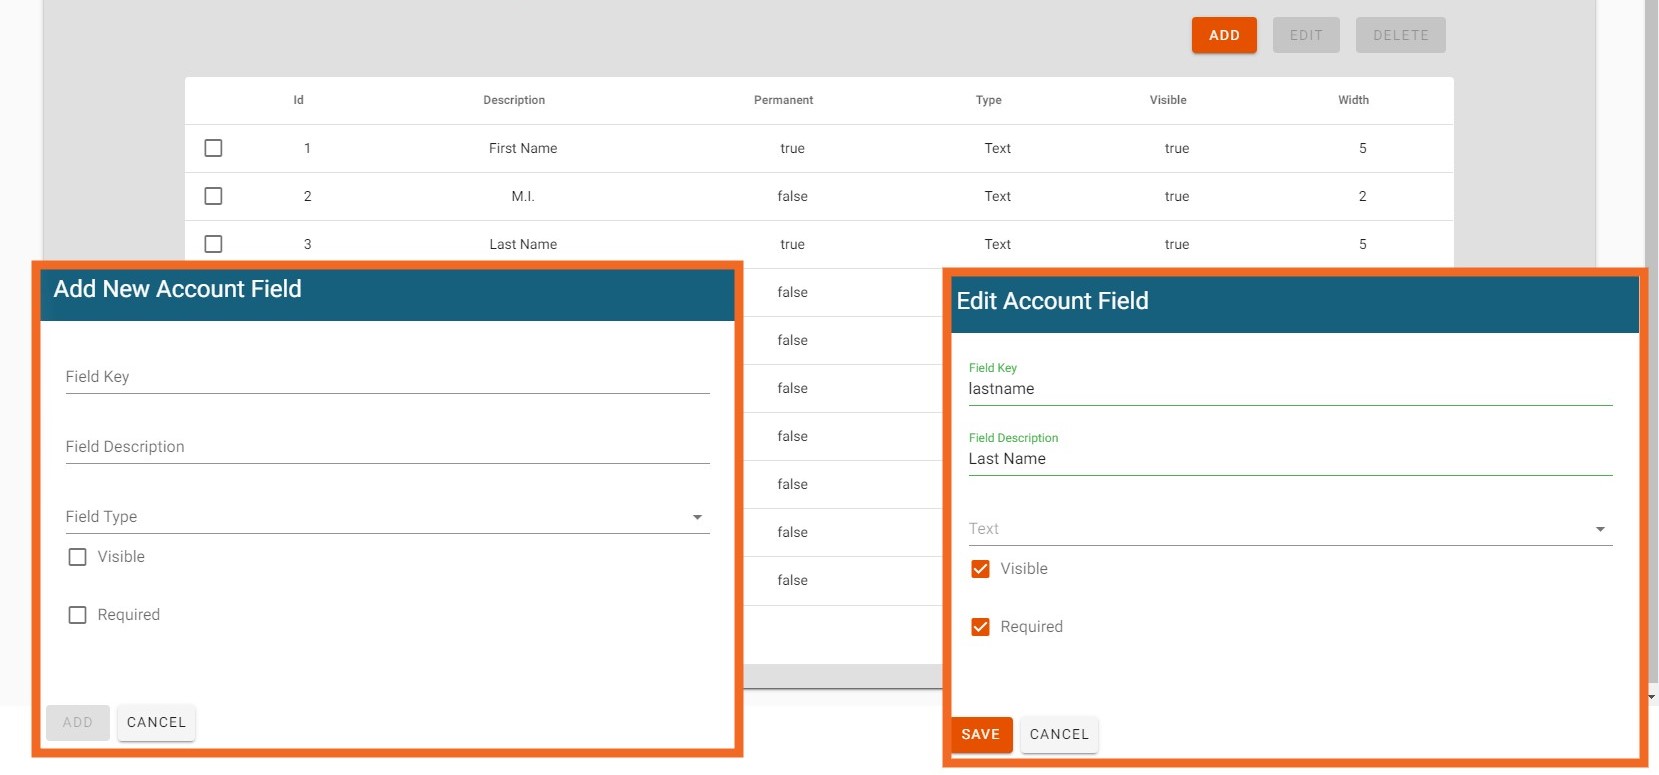
On the Tab labeled Account Data Form, Account Data Fields can be customized by the User by clicking on the "Account Data Fields" tab in the upper ribbon. Data Fields may be edited, added, or, if allowed, deleted. All Data Fields may also be made visible or hidden and the length of the fields can be adjusted by clicking on the Field. User can drag and drop fields to change position in the Add Account popup. Accounts List are the Account Data Fields reflected on the Accounts Page of Workshop. Account Fields can be rearraged in the Account List by dragging and dropping the columns or adding columns that are hidden. All selections in Account Data Form and and Account List sync with the Capture Application. First and Last Name are Required Fields and cannot be edited or deleted. Before an Account can be created or edited, the User must populate fields marked as "Required". For TouchMD integration, DOB must be a required field.
Account Documents Fields
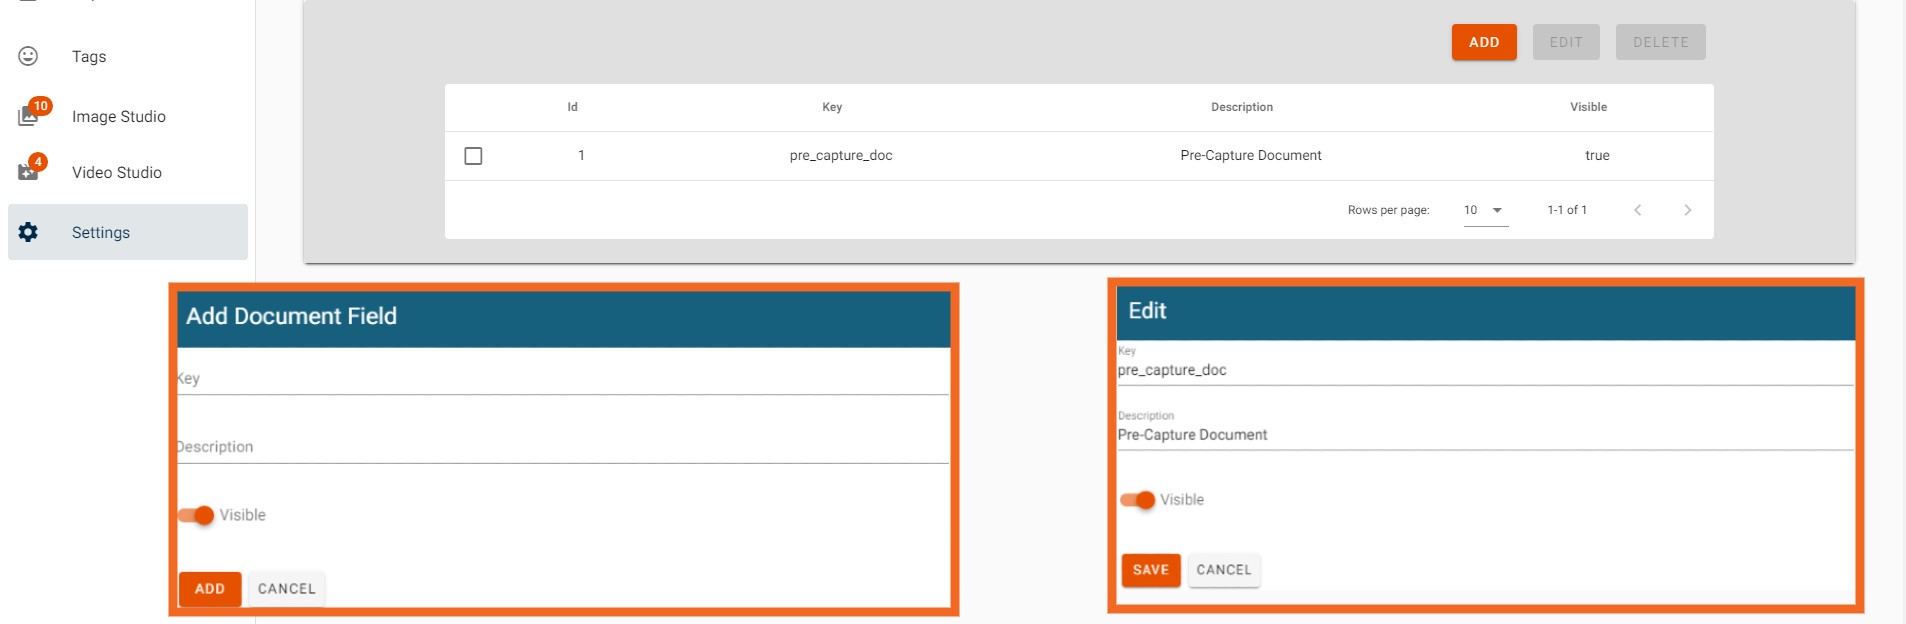
Organizations may elect to allow for documents to be appended to Accounts. Account Document Fields allows for Document Fields to be added, deleted and edited. Pop up boxes will appear for adding and editing as shown in the images below. Once required information is entered, click on the "Save" icon.
Tags
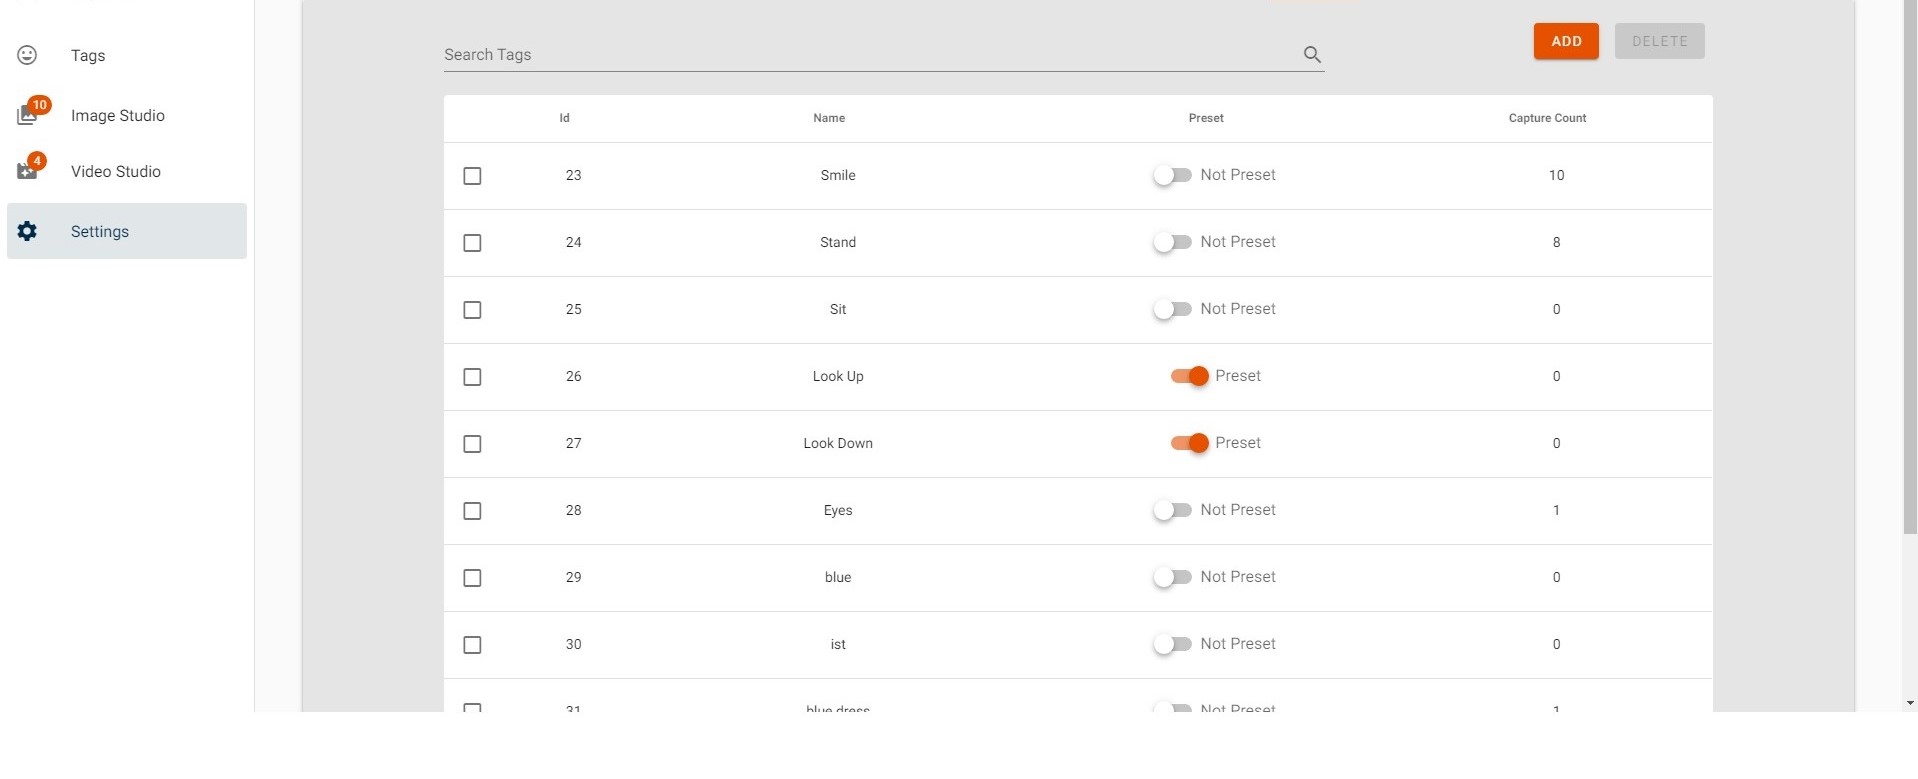
Tags entered into the system can be viewed by clicking on the "Tags" tab in the upper ribbon. Additional Tags can be added here, or at the time of Capture by the User.
Preset Frame Profiles
Customers can create multiple preset frame profiles applicable for all Users of their Workshop software. Profile settings are found in the tab labeled "Preset Frame Profiles". The Default Profile is comprised of 5 stills at 1, 45, 90, 135, and 180 degrees. Profiles can contain as few or as many stills as desired. To add a Profile, click on the Add button at the top, enter a name for the Profile and select the desired frames then click Add. The Profile will then be available where Presets are selectable. An existing profile can also be edited to delete or add frames. Click on the pencil icon and a pop up will appear indicating the current frames included.
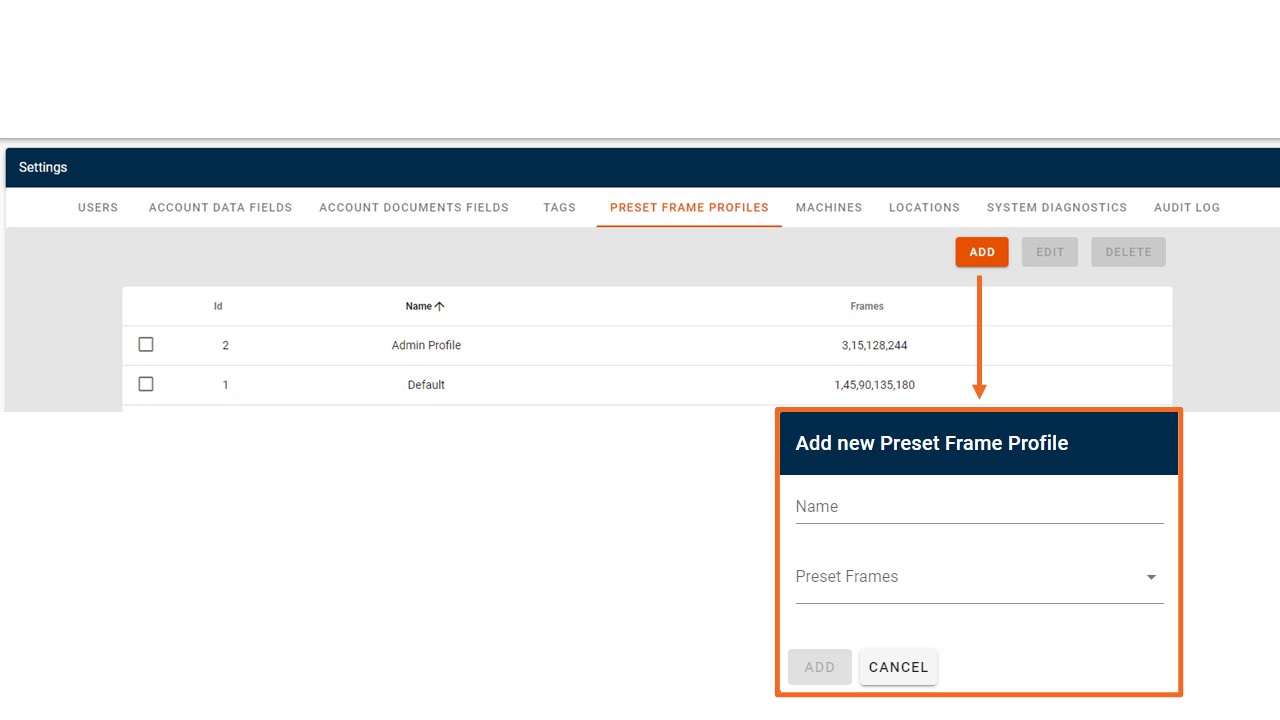
If customer is utilizing TouchMD integration, a Preset Frame Profile with the name TouchMD must be present. To create the profile follow the steps above, selecting the desired still frames for integration as shown in the screenshot below.
If customer has oVioAi enabled, a preset will be present with ID of 9999. The Name and Frames may be edited, if desired.
Ai Metering
If customer's cloud environment has oVioAi enabled for metered per scan usage, the usage can be monitored by the Organization Administrator by navigating to Settings>Metering. The number of Ai scans for the last billing period are shown; however, User can select a custom range for viewing and/or downloading. Each page of results are counted as a separate scan. Projects may contain more than one scan, depending on how many frames from a Capture are selected.