Settings
Users
System Settings can be accessed by clicking on the Settings tab in the left panel. User can navigate to any desired Setting (with appropriate permission level) by clicking on the appropriate tab in the top ribbon.
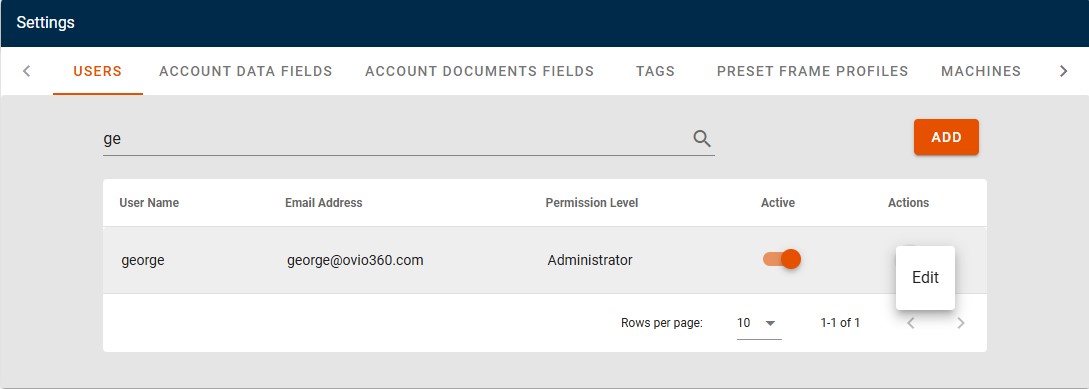
Users can be added, searched for using search as you type, and edited on the Users tab by clicking Edit to the right of the User Name or clicking Add. A pop up box will appear. Enter required information and click the "Save" icon. Users may only edit or add Users at or below their permission level. There may only be one Organization Administrator per customer account and can only be set by an oVio Internal Administrator.
User Account Activation and Password Reset
New Users will receive an email from support@ovio360.com with a link to activate their account and set and confirm a password. Password requirements are a minimum of eight characters with a mix including one upper case, one lower case, one number, and one special character. Users requesting a reset of their password through their Organization Administrator or through the "Forgot Password" function found on the login page will also receive an email from support@ovio360.com with a link to set their password.
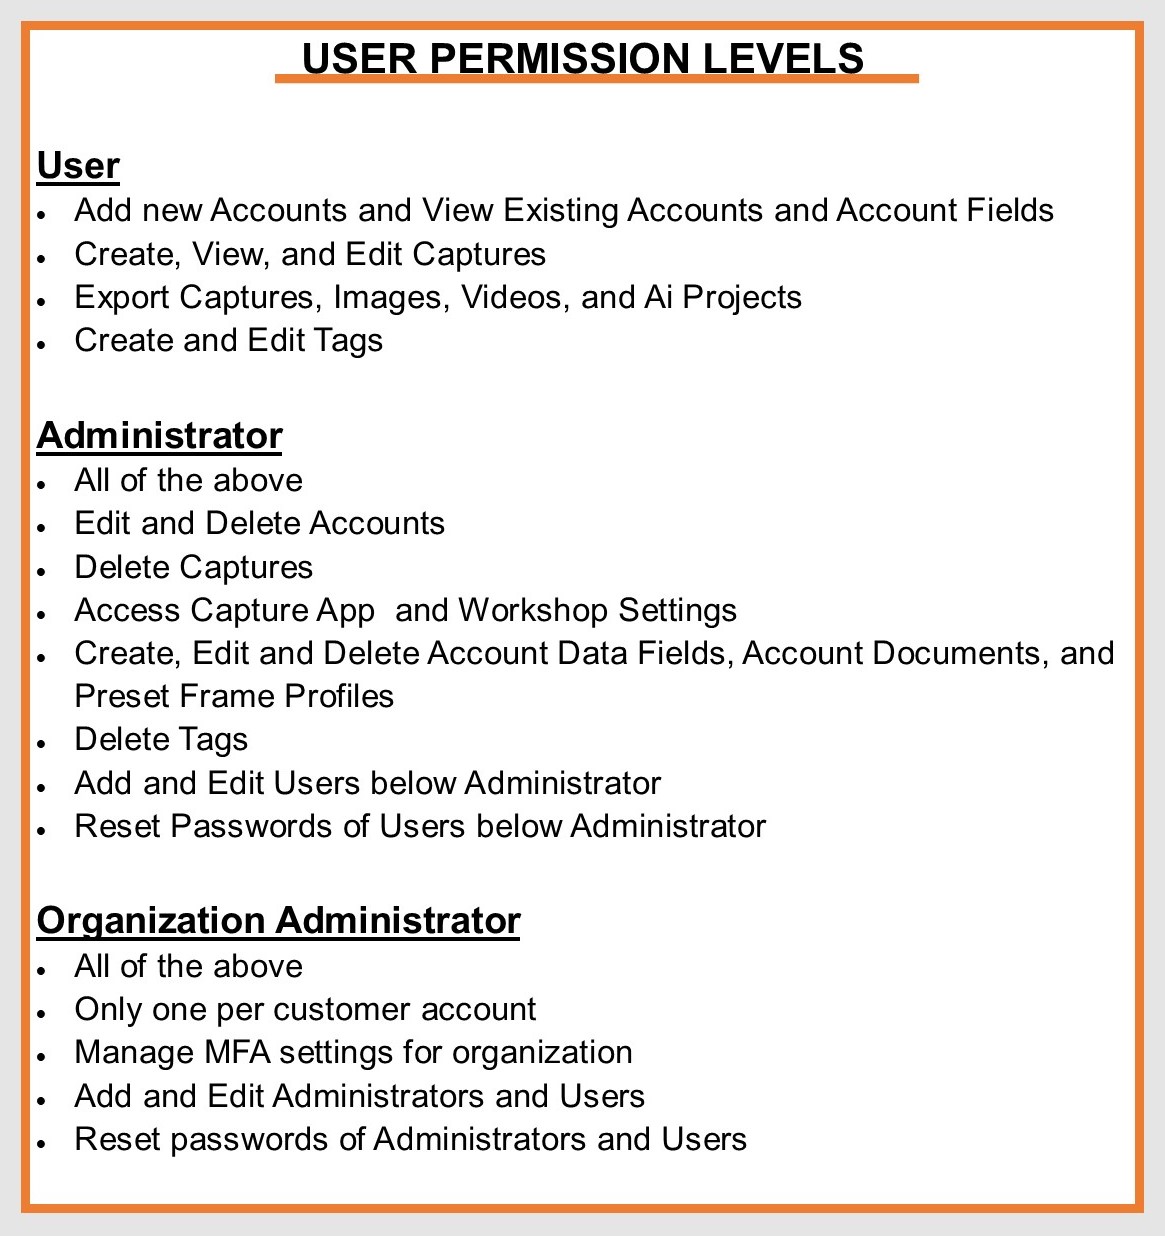
User Permission Levels
Multi-Factor Authentication (MFA)
The Organization Administrator has the ability to enable or disable MFA for all Users in the organization. MFA cannot be set on an individual User basis.
- When the Organization Administrator is logged into their account in Workshop, a tab for Organization Settings will appear to the left of the Users tab.
- Clicking on the elipsis below Actions the Organization Administrator will have the option to Edit the MFA settings
- A popup will appear with a button to enable or disable 2FA or MFA.
- Under Method Authenticator should be checked to complete the enabling process, followed by the SAVE button.
If MFA is enabled all Users in the organization will need to follow the instructions below for User MFA Setup. If MFA is NOT enabled, there will not be any change to User login. 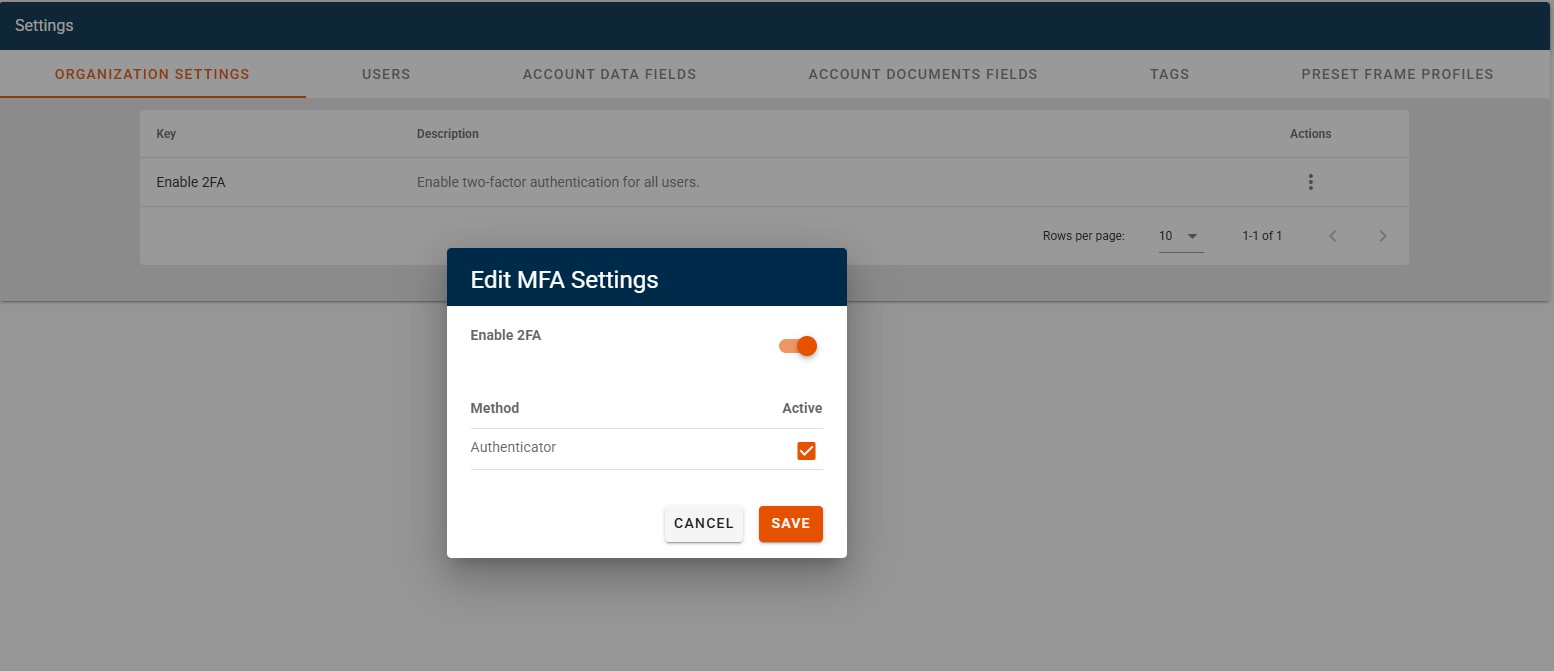
User MFA Setup
- After MFA is enabled for the organization, existing Users will be required to reset their passwords at their next attempted login if their passwords do not meet the minimum requirements outlined below. They will see a popup that indicates a link will be emailed to reset their password.
 If their password is already compliant with minimum standards they will proceed directly to MFA Setup shown below.
 - The link in the email will take the User to the Password Reset page to enter a new password.
- Eligible passwords will require a minimum length of eight characters comprised of a mix of upper and lower case, numeric and special characters.
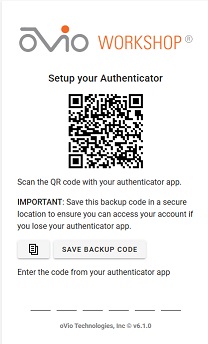
- User will be taken to the login page after successfully resetting their password at which time they will be directed to a page to setup their preferred Authenticator (Google, Microsoft, or any other TOTP based application) by scanning the provided QR code.
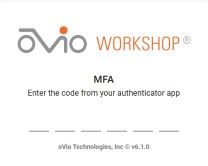
- Each subsequent login will require a new code from the same Authenticator.
User MFA Reset
If a User loses their connection to the Authenticator application, the Organization Administrator can Reset MFA for the User which will require the User to repeat the above process. The Reset function can be found in the Users tab by clicking on the elipsis next to the User requiring rest and then selecting Edit, then Reset MFA. User will then be required to repeat the initial setup process after receiving a link for password reset.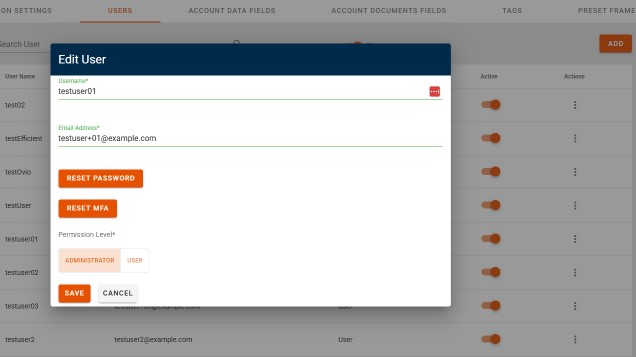
Account Data Fields
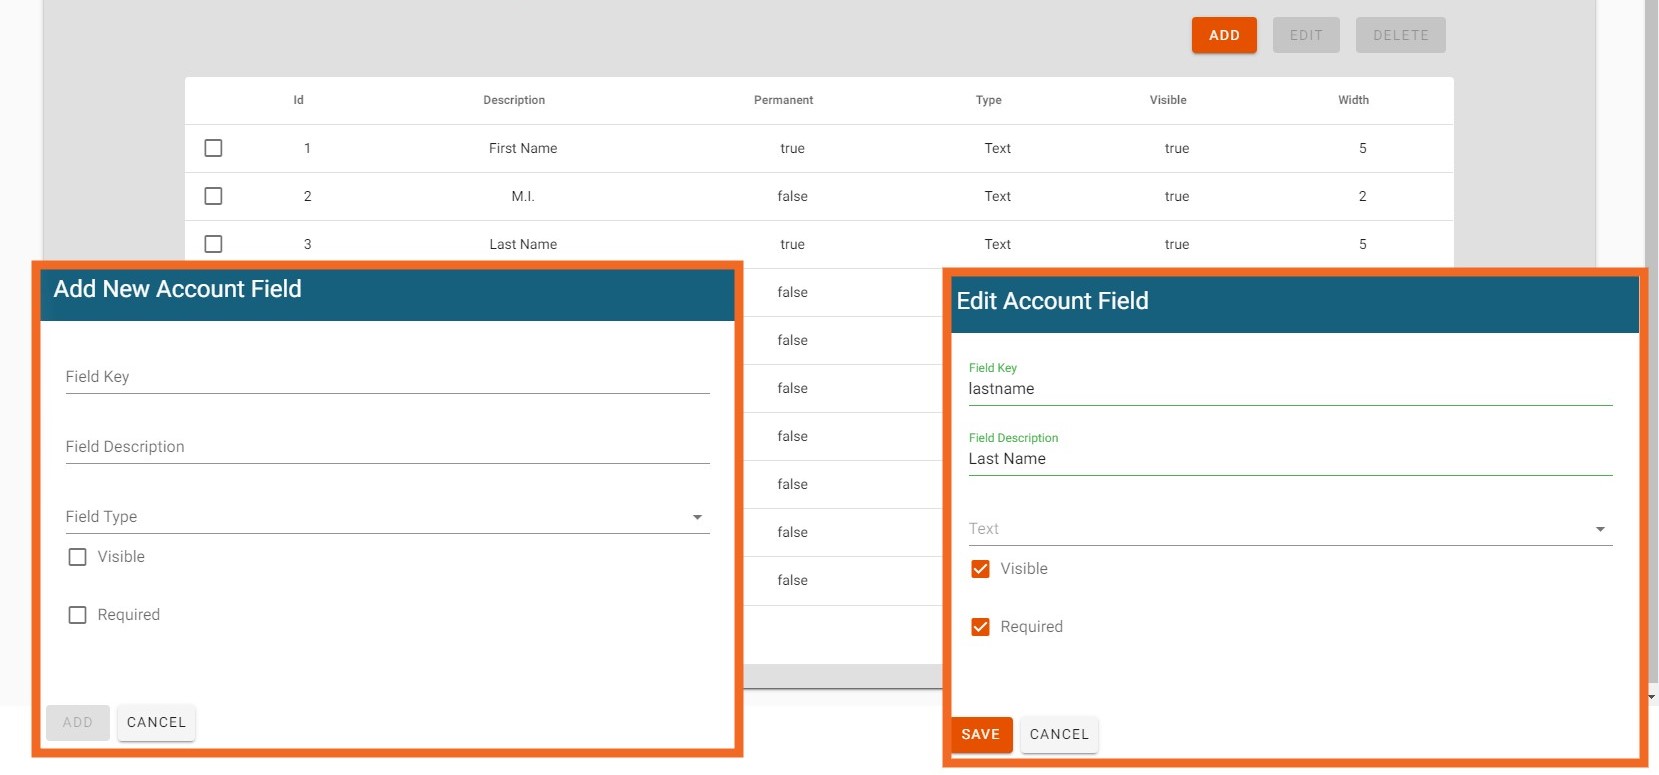
Account data fields can be customized by the User by clicking on the "Account Data Fields" tab in the upper ribbon. Data Fields may be edited, added, or, if allowed, deleted. Before an Account can be created or edited, the User must populate fields marked as "Required". All data Fields may also be made visible or invisible in the Capture and Workshop interface. Changes must be saved prior to leaving the page. For TouchMD integration, DOB must be a required field.
Account Documents Fields
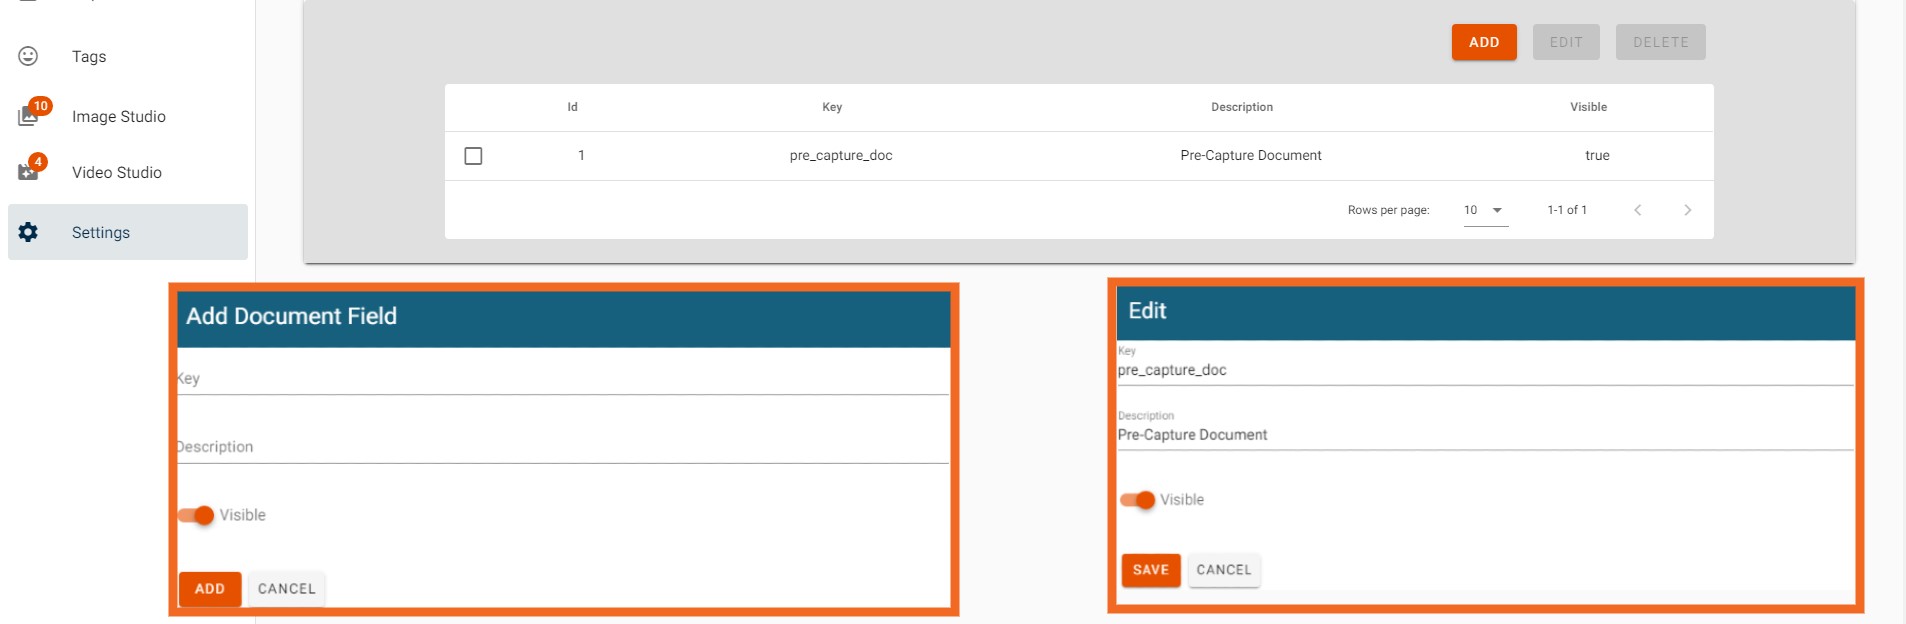
Organizations may elect to allow for documents to be appended to Accounts. Account Document Fields allows for Document Fields to be added, deleted and edited. Pop up boxes will appear for adding and editing as shown in the images below. Once required information is entered, click on the "Add" or "Save" icon.
Tags
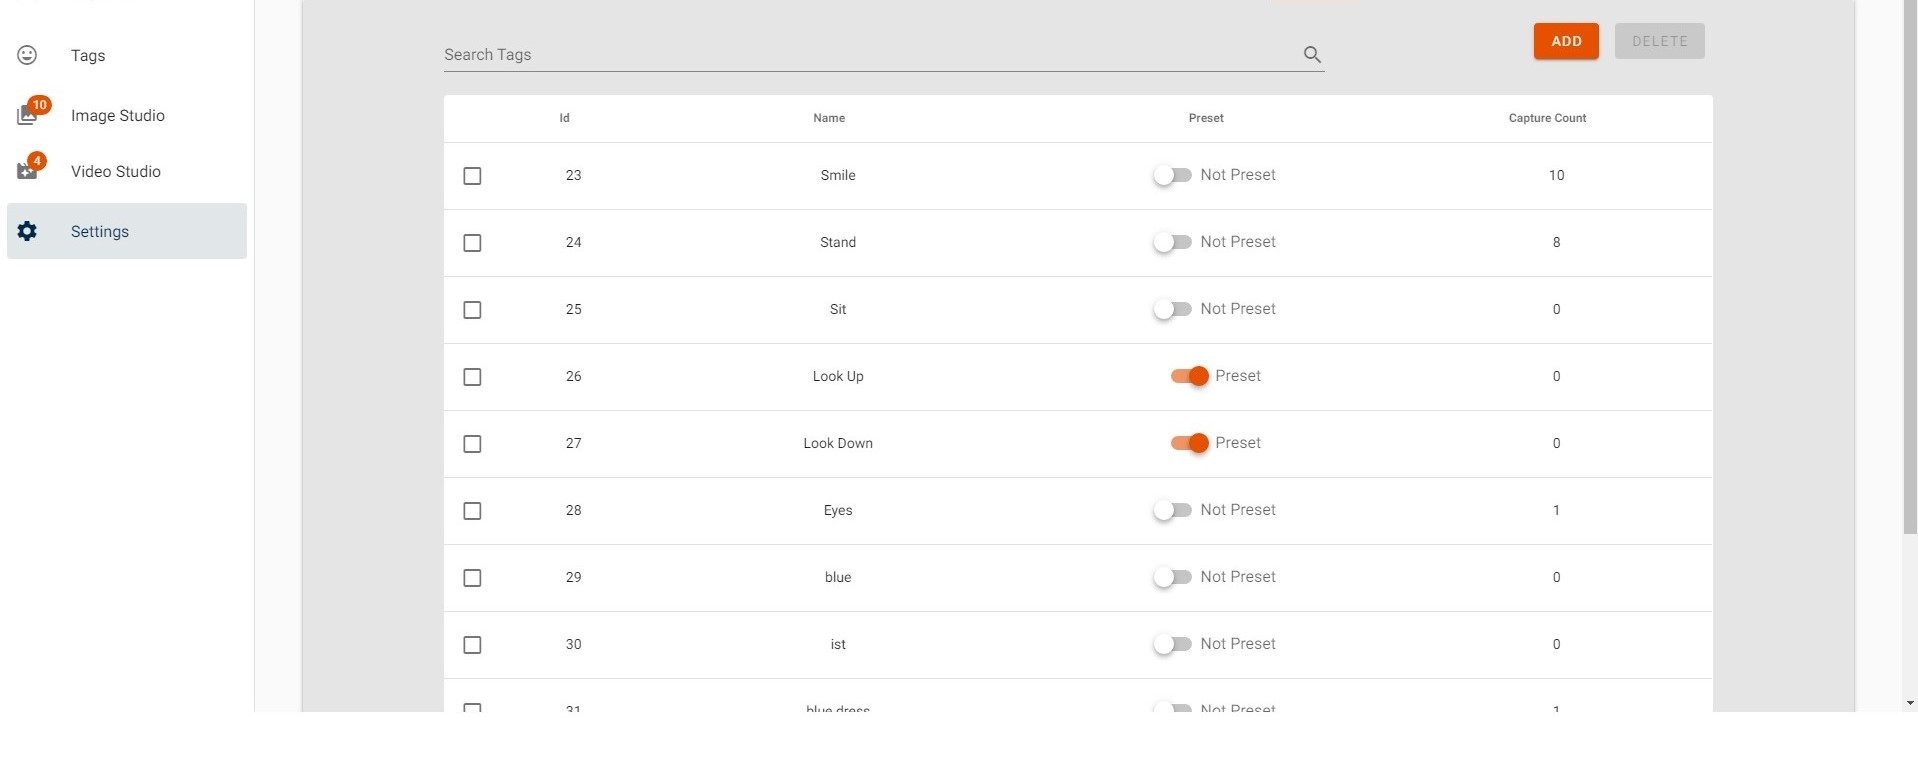
Tags entered into the system can be viewed by clicking on the "Tags" tab in the upper ribbon. Additional Tags can be added here, or at the time of Capture by the User.
Preset Frame Profiles
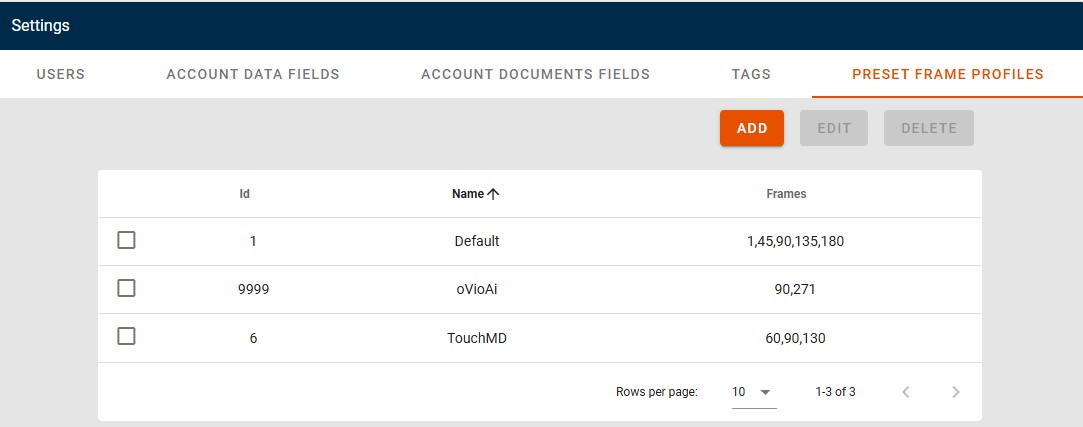
Customers can create multiple preset frame profiles applicable for all Users of their Workshop software. Profile settings are found in the tab labeled "Preset Frame Profiles". The Default Profile is comprised of 5 stills at 1, 45, 90, 135, and 180 degrees. Profiles can contain as few or as many stills as desired. To add a Profile, click on the Add button at the top, enter a name for the Profile and select the desired frames then click Add. The Profile will then be available where Presets are selectable.

If customer is utilizing TouchMD integration, a Preset Frame Profile with the name TouchMD must be present. To create the profile follow the steps above, selecting the desired still frames for integration as shown in the screenshot below.
If customer has oVioAi enabled, a preset will be present with ID of 9999. The Name and Frames may be edited, if desired.
Machines
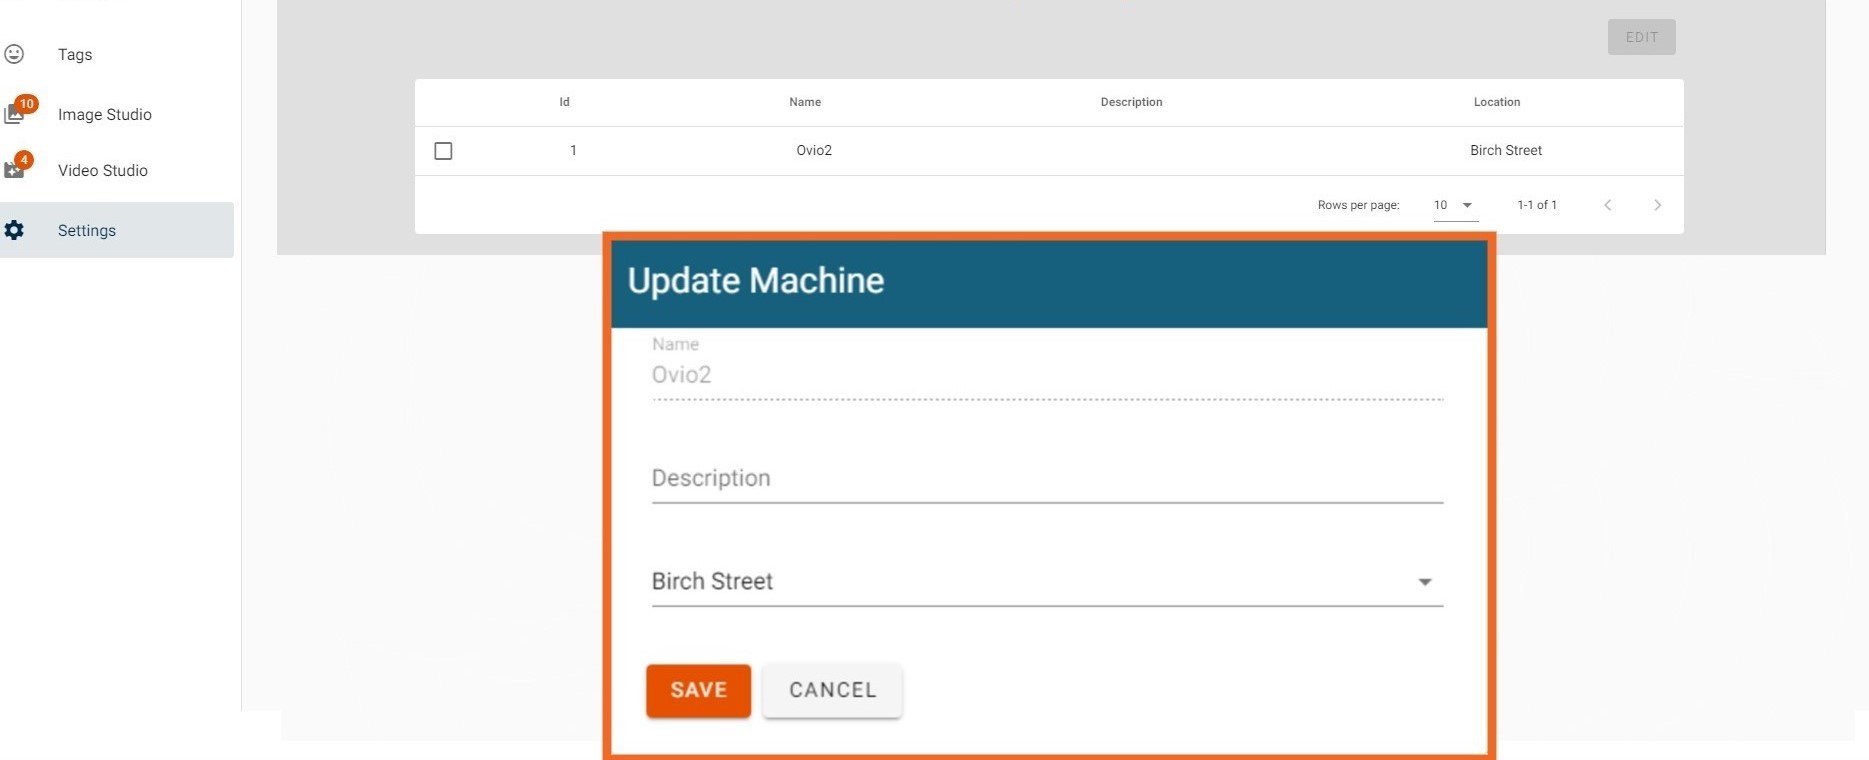
With the appropriate User permission, User may edit the location of a Machine by selecting Machines from the upper ribbon and highlighting the machine and clicking on Edit. A drop down menu of available locations will appear, select the desired location and click "Save".
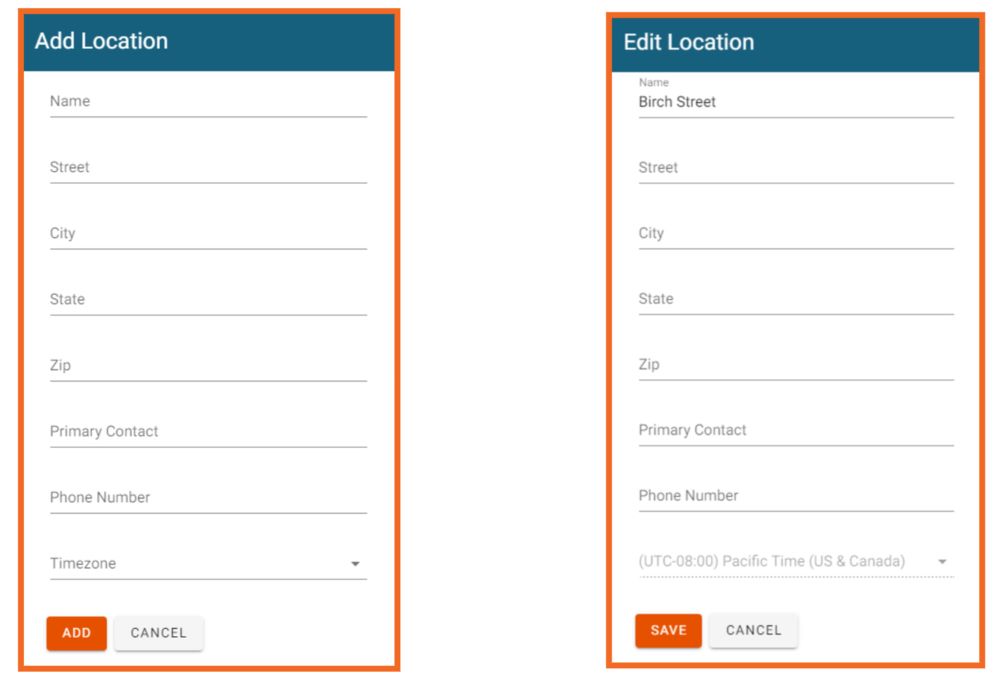
Locations
Locations may be added and edited by clicking on the "Locations" tab in the upper ribbon and either selecting a Location to Edit or clicking the "Add" icon in the upper right corner.